THINGS TO KNOW BEFORE YOU GO:
Location: Tongariro National Park, central North Island
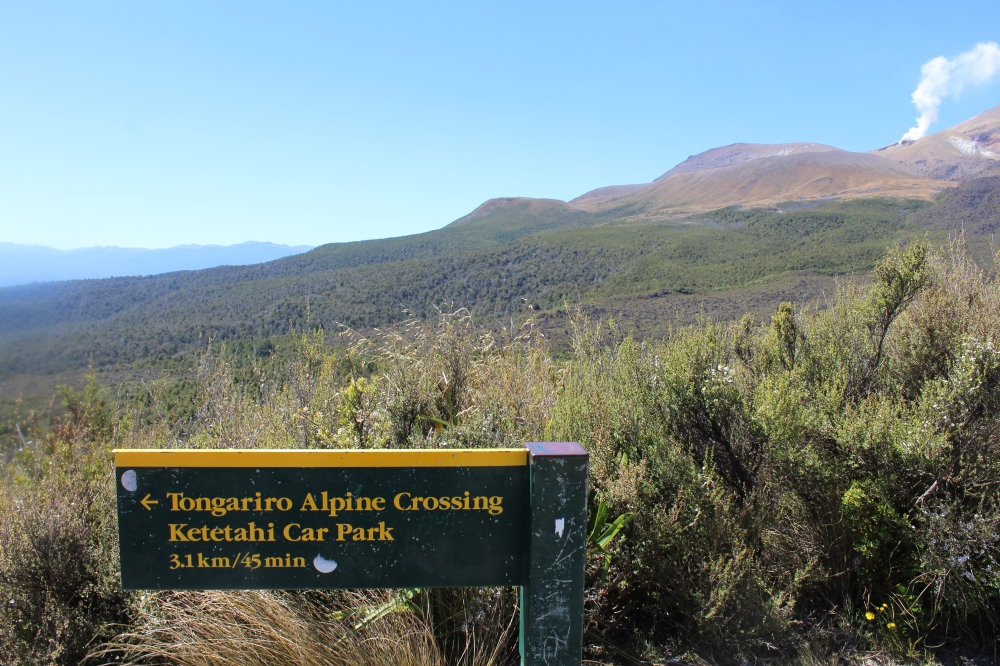
Parking: Yes, however I would recommend getting there early to get as close to the start as possible. There are also shuttle buses you can book to avoid having to take your car. Note, that both car parks are down gravel roads (Ketetahi Car park- 1 km and Mangatepopo Road – 7 km).
Toilets: Yes, at the car parks and a few scattered along the walk.
Dogs: No
Shoes: Hiking boots or sneakers. A lot of people were wearing sneakers, however I was thankful for my hiking boots on the rough volcanic surfaces
Date Walked: 5th February 2017
Weather Conditions: Cold to start (7 degrees) but warmed up through out the day. We had a perfect blue sky day
Distance: 19.4 km
Time Required: Recommended time 6 hours 20 minutes. We completed it in 5 hours 55 minutes which included lots of stopping and taking photos, plus a 20 minute lunch break.
Final Rating: ★★★★★
GETTING THERE
We started the walk from the Mangatepopo Road end, which is the preferred way. (I will speak about this later in this blog). Travel along SH 47 to the National Park, you will see a sign on the left saying ‘Tongariro Alpine Crossing, Turn Left 400 m’ and then a sign showing you where to turn. From here it is a 7 km journey down a gravel road, to the start of the walk.
IN MY BACKPACK
Always be over prepared for a walk like this!! The weather can change at any time, and you don’t want to find yourself unprepared. In my backpack I had, 3 L of water, my rain jacket, packed lunch (high energy foods, 2 sandwiches, fruit, snacks etc) camera, an extra pair of socks, a change of clothes in case I got wet, sunblock, hand sanitiser (for after the use of the horrible long drops) and some wet wipes. Other items you could have taken was an emergency blanket, first aid kit etc. My sister had a few plasters in her back pack which is a really good idea for blisters etc.
I would recommend taking as much water as you can carry. I had 3 liters in my back pack, and by the time I got to the end, I only had about 600 ml left which I then drank in the car on the way home. I would also recommend taking plenty of food, just in case you do get into trouble up on the mountain. For a walk like this, remember it is better safe than sorry!
WHAT I WORE
because the weather this weekend had been beautiful, I didn’t want to get too hot, nor be too cold. I chose to wear my Kathmandu shorts, a breathable Kathmandu singlet, my thermal hiking socks, and my Scarpa hiking boots. I also had a warm Hunting & Fishing jumper on at the beginning of the walk, which I soon took off at the bottom of Devils Staircase.
In my Kathmandu Gluon backpack, I had my Macpac rain jacket, Nike leggings for in case I got cold, and another pair of my thermal hiking socks.
Overall, I was very happy with my choice in clothing. The beginning of the walk was a cool 7 degrees, as we started at 5.40 am and the sun was still behind Mt. Tongariro. Once we were up in the sun, the shorts and singlet were perfect. This may be different for you however, please assess the weather conditions before deciding what to wear.
There were people doing this walk in sneakers, and while most of the walk was OK for sneakers, a lot of the path is made from volcanic rock and there for, rather rough. If you have comfortable hiking boots, I would recommend wearing these. I would not recommend to buy a brand new pair and wear them for the first time on this walk.
THE WALK
For me, the walk began in the Mangatepopo car park. There are toilets here, I would suggest avoiding if possible, they aren’t very nice.


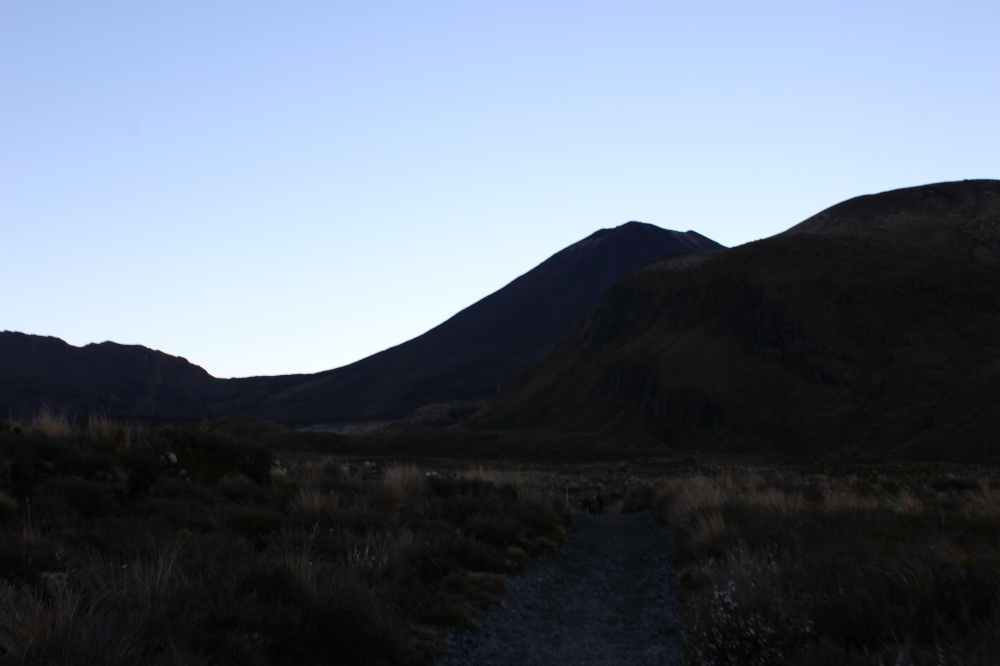
And then, the walk began! Over a nice but rocky path, made from large volcanic rocks. If you stubbed your toe into a rock while wearing sneakers, it wouldn’t be pleasant. Here, the hiking boots were excellent. Unfortunately, because it was 5.40 am the following photo is quite dark, but I thought i would include them to give you an idea of the start of the track.
15 minutes into the walk, there is a toilet off to the left of the track. This one may be nicer than the one at the car park, as it may get less use.
2 minutes down the track from the toilet, there is a junction with many walking options. This was great to see, as I would like to come back and do more walks in the National Park.

Past the first sign, the walk turned from gravel track to boardwalk. This was beautiful, the scenery along this walk is amazing. If you aren’t up for the full walk, even just getting to the base of devils stair case would be an excellent walk.

Up the track, there are a few sets of stairs, either man-made or carved into the rock. Along the way there are some lovely water falls.


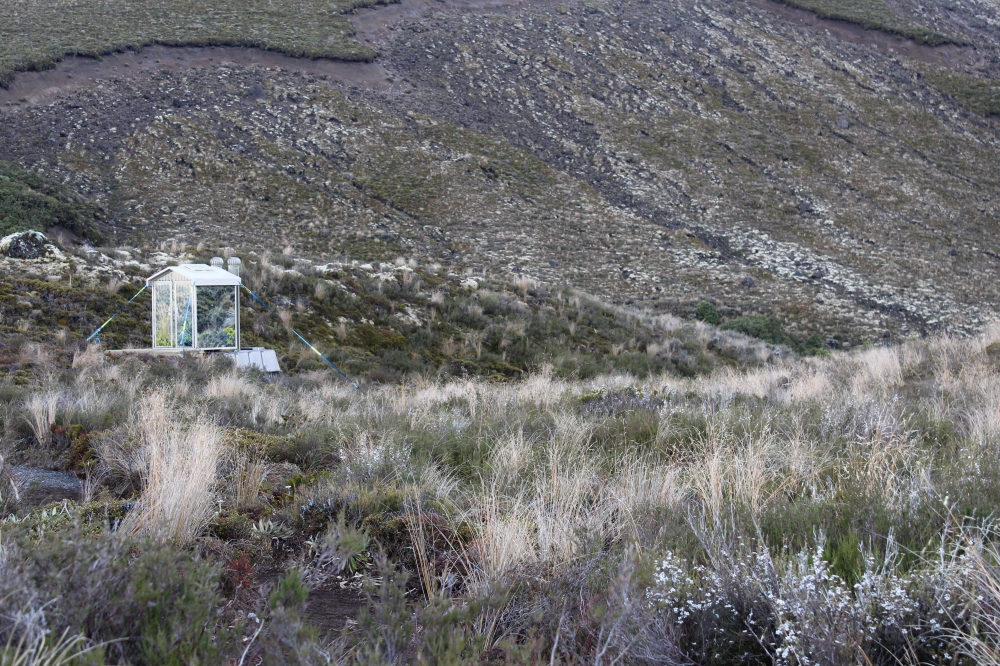
40 minutes later, we arrived at another toilet stop, and the junction for the optional walk to Soda Springs. We decided not to go for the short walk to Soda Springs, as you are able to see it from the track (pictured below). Soda Springs marks the bottom of the Devils Staircase, so if you were wanting just a short walk, this would be the time to turn back!


So, from here, we began the walk up Devils Staircase. It is quite hard to get a telling picture of Devils Staircase. The below picture, follow the stairs up the right hand side of the picture, then over the left top. In all honesty, these stairs weren’t as bad as what I thought. In my opinion, if you can do the Camp Sladdin stairs, you can do these. It’s all about taking your time, stopping when you need to, and not rushing. I found that even though there were people behind and in front of me, you either give way or over take. Everyone’s in the same boat, so just take your time and you will be at the top in no time! It never felt never-ending, or too strenuous.


You will see a sign that says Ngauruhoe Summit Route, turn off 5 minutes. Rest assured, there are no more stairs after this point.

And then, we made it to the top!

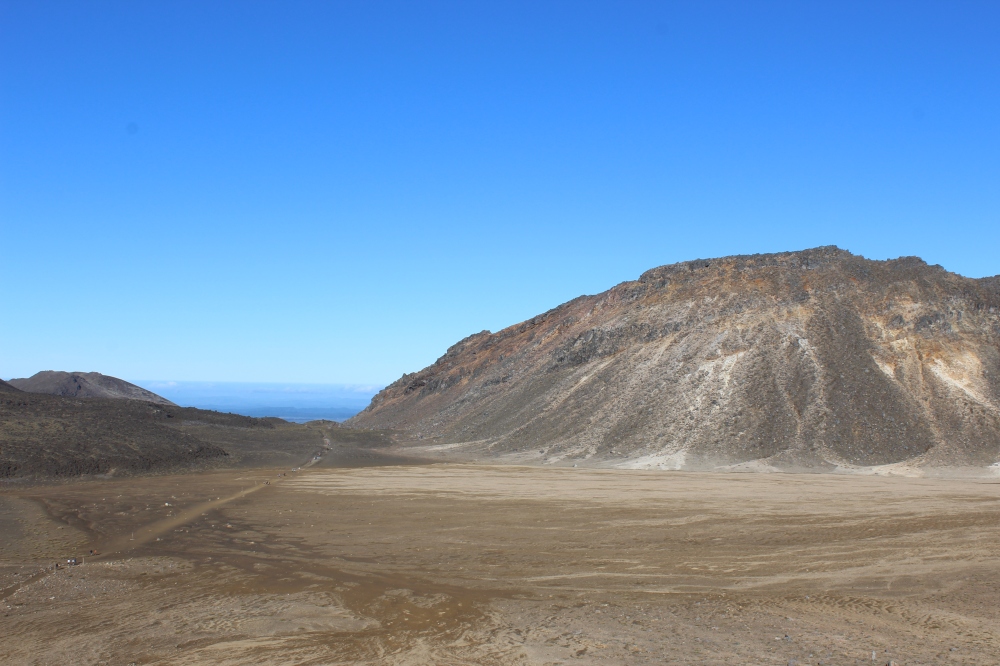
At the top, you are at the base of Ngauruhoe. Wow. We decided not to climb Ngauruhoe this time, and maybe not next! It looks quite daunting. Here, there is also another sign letting you know how much further there is to go, and optional other walks.


Good news, the next 1 km or so is completely flat. Half way along the flat I could see some tiny objects up on the far hill. Needless to say, those tiny objects where people and that’s where we were headed next!!

Past the flats, we began the climb up the side of the mountain. Unfortunately, because of the slippery rock surface we were climbing up, I didn’t have a chance to get many pictures of this stage of the walk. Here is a photo from up the first stage of the climb, looking back along the flats (left hand side of the picture) we had just walked across to show you how high we were already getting.
On some parts of the final climb, there are metal chains to hold on to, to assist you up the hill.

Once at the top, you can see a whole new side of Ngauruhoe. This was very pretty up here, and as you can see we had the perfect day for it!

Just past the below sign, was the Red Crater.


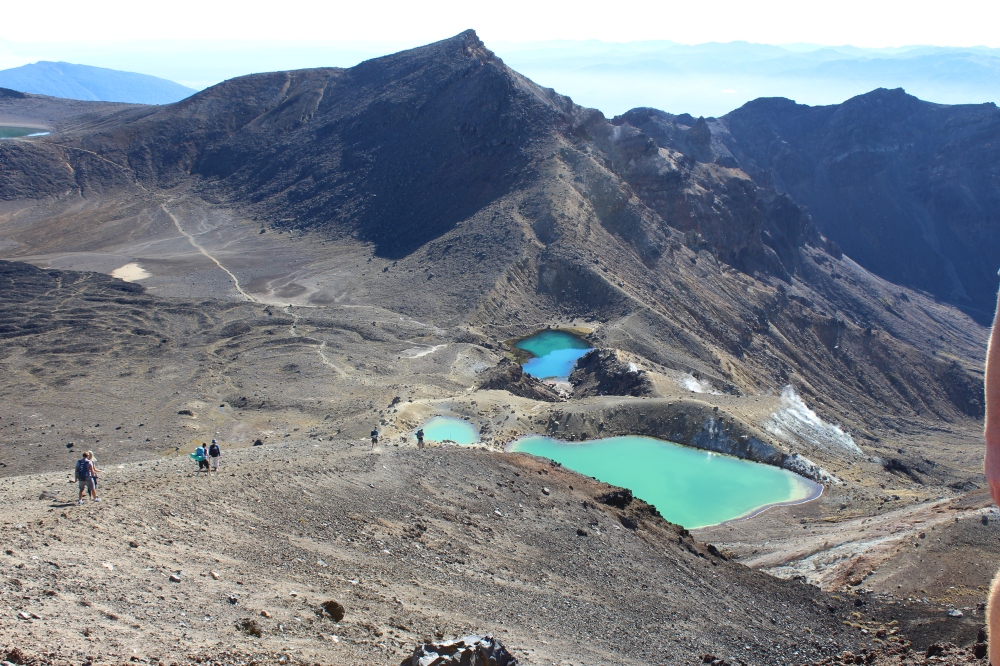
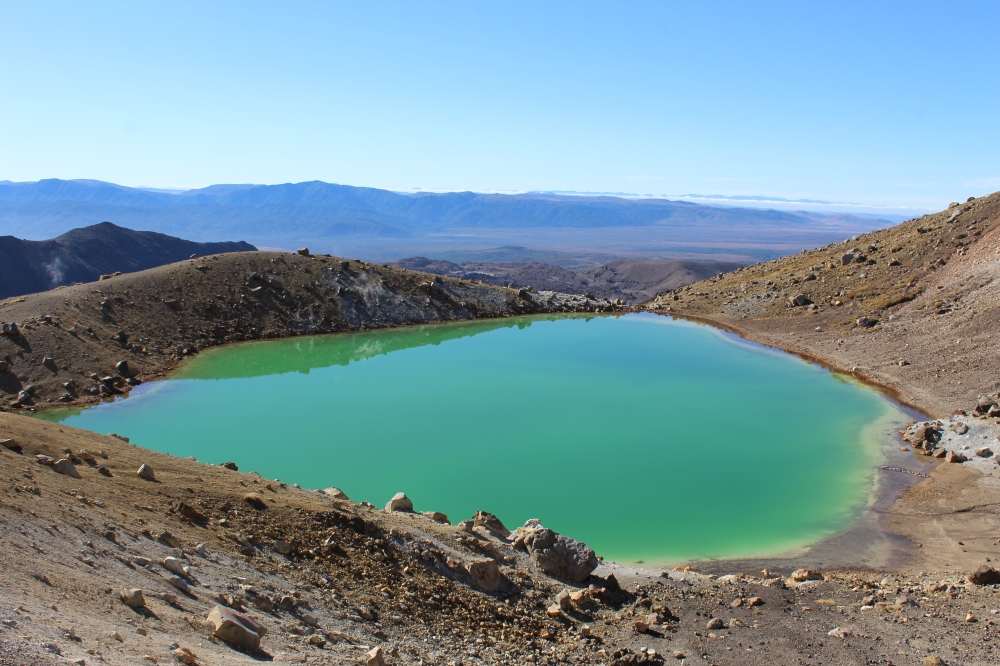
Past the Red Crater, there is one more hill to climb before you can see the Emerald Lakes! Which is the part I was most excited about! It will be worth mentioning now, that if you wish to do a one way trip, the top of the next hill before the Gravel Slide would be the best place to stop and turn back. Walking up the Gravel Slide wouldn’t be much fun in my opinion! Also, after the Emerald Lakes, you can see the Blue Lake in the distance, and after the Blue Lake, there is not as much to see.


Now, the fun really begins!! The infamous Gravel Slide! My best advice – if you want to take advice from someone who fell over 3 times – would be to stick to the soft surfaces and really dig your feet in. It’ll make sense when you get there!!
All down the Gravel Slide, the views of the Emerald Lakes were just beautiful.

Here is a view from the bottom looking back up the Gravel Slide. As I said before, if you start the walk at the Ketetahi car park, you will need to walk UP this way.


At the bottom, there is another junction, where you can choose to continue the Tongariro Crossing, or head off to one of the huts.


Off to the Blue Lake we headed, this is another flat part, and another short and sharp climb up a hill. Make sure you look back as there are some stunning views of the Red Crater, Ngauruhoe and Mt. Ruapehu (and the Gravel Slide you just survived)

Once up at the Blue Lake, we decided to stop for our 9 am lunch break. We had been walking for around 3 hours at this point, so it was nice to have a bit of a break before we began our decent.


The remainder of the walk, is almost all down hill. The track turns from volcanic surface to a man-made DOC track, typical of most walks in New Zealand. You weave your way around the mountain side, back and forth, back and forth. In all honesty, this was my least favorite part of the walk. The reason being, was that we could see where we were headed, but to get there, it took 2 and a half hours! I found that most information on this walk, didn’t touch much on this side of the track.

Along the way, there are some beautiful views or the lake and an active vent in the side of the volcano.


In this image, you can see what i mean about knowing where you’re headed, but taking forever to get there. In the photo below, you can see the hut just down the hill, and on the far right, that is the Ketetahi car park road.

45 minutes later, we arrived at Ketetahi Hut. There are some toilets here, and a sign stating 13 km, only 6.4 km to go!


Past the hut, unfortunately my feet began to get rather sore from walking on this man-made track. The track had a plastic meshing which would have been used to keep the gravel in place, although the gravel had all washed away. My hiking boots aren’t the comfiest on hard surfaces like this, but I just had to keep going, although I did slow down a little.
After 50 minutes, we arrived at another lot of toilets on the side of the track, along with a sign stating 45 minutes to the car park.

Past the sign, the track turned from open land to forest. This was a nice change as it was beginning to get rather hot, as the time approached midday. Once in the forest, there are a lot of stairs on the way down, and some lovely bridges crossing streams. 20 minutes into the forest, we found ourselves in an alarming Lahar Hazard zone!


Through the lahar zone, a boardwalk takes you past a beautiful flowing river, and over a bridge out of harms way.


20 minutes later, we arrived at the car park!! Woohoo!! The walk wasn’t over here though, because we were getting picked up, we needed to walk one more kilometer to the end of the road. The road was closed due to the car park being full. At the car park, there are more toilets.


And finally, at the end of the road.

All in all, I am extremely happy I completed this walk. The views along the way were amazing, and i would highly recommend as a must do walk in New Zealand. The walk wasn’t as challenging as I thought it might be, from reviews I had read online. My advice is, make sure you have a good mind-set, and a good pair of shoes. Take more water than you ever think you will need, and a variety of clothing as the weather can change at any time. If you feel like you can’t keep going after the red crater, this is your best opportunity to turn around and head back to the car park.
Along the walk there are so many other walks you can do, and I think one of my next walks is going to be the Tongariro Summit.

One Comment Add yours